
Downloading the Anaconda software
 |
| Figure 2: Anaconda Homepage |
We will download the version 3.6. We will select the installer of 32 bits or 64 bots according to what we have installed in our operating system. (If in doubt, this information should be in the systems settings menu, option ´About´ or similar).
 |
| Figure 3: We download the installer for our S.O. |
Once the software is downloaded, we can launch the installer. We will go through the usual questions:
 |
| Figure 4: We launch the installer. |
If the installation is only for the user who has initiated the session or for everyone in the team who will use it (in this case, it will be necessary to appoint administrative privileges).
 |
| Figure 5: Installation for user or for team |
The installation route:
 |
| Figure 6: We select the installation route |
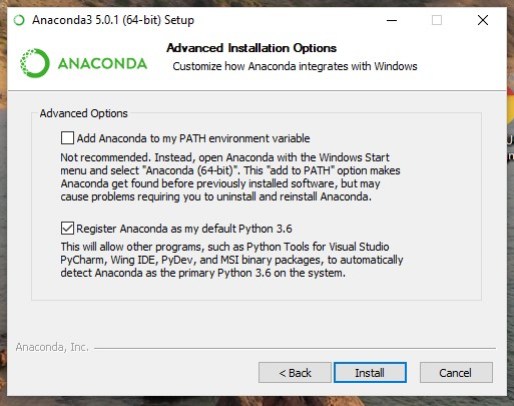
How we want to integrate our software (in this instance Windows), we select the recommended defect option.
 |
| Figure 7: We select how we want it to register in Windows |
And that’s all. Simple, right?
 |
| Figure 9: Anaconda Cloud. |
 |
| Figure 10: |
If you write ´help()´ you can access the interactive help feature. Also, you can practice with this tutorial. In particular, we recommend the section ´3 An Informal Introduction to Python´.
In the following post, we will learn about Jupyter Notebooks, create on of our own and get everything ready to start working on libraries. Don´t miss it!
All the posts in this tutorial are here:
- Introduction: Machine Learning with Python for all audiences.
- Python for all (1): Installation of the Anaconda environment.
- Python for all (2): What are the Jupiter Notebook ?. We created our first notebook and practiced some easy commands.
- Python for all (3): What are bookstores ?. We prepare the environment.
- Python for all (4): We started the experiment properly. Data loading, exploratory analysis (dimensions of the dataset, statistics, visualization, etc.)
- Python for all (5) Final: Creation of the models and estimation of their accuracy
The post Python for all (1): Installation of the Anaconda environment appeared first on Think Big.
